实现Servlet服务器
在上一节,我们已经成功实现了一个简单的HTTP服务器,但是,好像和Servlet没啥关系,因为整个操作都是基于HttpExchange接口做的。
而Servlet处理HTTP的接口是基于HttpServletRequest和HttpServletResponse,前者负责读取HTTP请求,后者负责写入HTTP响应。
怎么把基于HttpExchange的操作转换为基于HttpServletRequest和HttpServletResponse?答案是使用Adapter模式。
首先我们定义HttpExchangeAdapter,它持有一个HttpExchange实例,并实现HttpExchangeRequest和HttpExchangeResponse接口:
interface HttpExchangeRequest {
    String getRequestMethod();
    URI getRequestURI();
}

interface HttpExchangeResponse {
    Headers getResponseHeaders();
    void sendResponseHeaders(int rCode, long responseLength) throws IOException;
    OutputStream getResponseBody();
}

public class HttpExchangeAdapter implements HttpExchangeRequest, HttpExchangeResponse {
    final HttpExchange exchange;

    public HttpExchangeAdapter(HttpExchange exchange) {
        this.exchange = exchange;
    }

    // 实现方法
    ...
}
紧接着我们编写HttpServletRequestImpl,它内部持有HttpServletRequest,并实现了HttpServletRequest接口:
public class HttpServletRequestImpl implements HttpServletRequest {
    final HttpExchangeRequest exchangeRequest;

    public HttpServletRequestImpl(HttpExchangeRequest exchangeRequest) {
        this.exchangeRequest = exchangeRequest;
    }

    // 实现方法
    ...
}
同理,编写HttpServletResponseImpl如下:
public class HttpServletResponseImpl implements HttpServletResponse {
    final HttpExchangeResponse exchangeResponse;

    public HttpServletResponseImpl(HttpExchangeResponse exchangeResponse) {
        this.exchangeResponse = exchangeResponse;
    }

    // 实现方法
    ...
}
用一个图表示从HttpExchange转换为HttpServletRequest和HttpServletResponse如下:
   ┌──────────────────────┐ ┌───────────────────────┐
   │  HttpServletRequest  │ │  HttpServletResponse  │
   └──────────────────────┘ └───────────────────────┘
               ▲                        ▲
               │                        │
   ┌──────────────────────┐ ┌───────────────────────┐
   │HttpServletRequestImpl│ │HttpServletResponseImpl│
┌──│- exchangeRequest     │ │- exchangeResponse ────┼──┐
│  └──────────────────────┘ └───────────────────────┘  │
│                                                      │
│  ┌──────────────────────┐ ┌───────────────────────┐  │
└─▶│ HttpExchangeRequest  │ │ HttpExchangeResponse  │◀─┘
   └──────────────────────┘ └───────────────────────┘
                      ▲         ▲
                      │         │
                      │         │
                 ┌───────────────────┐
                 │HttpExchangeAdapter│   ┌────────────┐
                 │- httpExchange ────┼──▶│HttpExchange│
                 └───────────────────┘   └────────────┘
接下来我们改造处理HTTP请求的HttpHandler接口:
public class HttpConnector implements HttpHandler {
    @Override
    public void handle(HttpExchange exchange) throws IOException {
        var adapter = new HttpExchangeAdapter(exchange);
        var request = new HttpServletRequestImpl(adapter);
        var response = new HttpServletResponseImpl(adapter);
        process(request, response);
    }

    void process(HttpServletRequest request, HttpServletResponse response) throws ServletException, IOException {
        // TODO
    }
}
在handle(HttpExchange)方法内部,我们创建的对象如下:
- HttpExchangeAdapter实例:它内部引用了jdk.httpserver提供的HttpExchange实例;
- HttpServletRequestImpl实例:它内部引用了HttpExchangeAdapter实例,但是转换为HttpExchangeRequest接口;
- HttpServletResponseImpl实例:它内部引用了HttpExchangeAdapter实例,但是转换为HttpExchangeResponse接口。
所以实际上创建的实例只有3个。最后调用process(HttpServletRequest, HttpServletResponse)方法,这个方法内部就可以按照Servlet标准来处理HTTP请求了,因为方法参数是标准的Servlet接口:
void process(HttpServletRequest request, HttpServletResponse response) throws ServletException, IOException {
    String name = request.getParameter("name");
    String html = "<h1>Hello, " + (name == null ? "world" : name) + ".</h1>";
    response.setContentType("text/html");
    PrintWriter pw = response.getWriter();
    pw.write(html);
    pw.close();
}
目前,我们仅实现了代码调用时用到的getParameter()、setContentType()和getWriter()这几个方法。如果补全HttpServletRequest和HttpServletResponse接口所有的方法定义,我们就得到了完整的HttpServletRequest和HttpServletResponse接口实现。
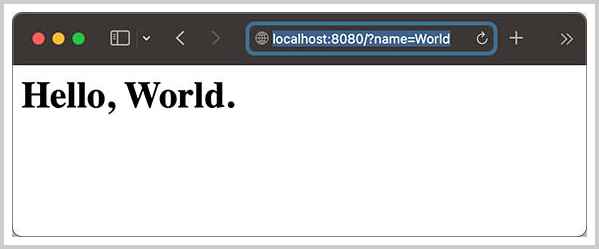
运行代码,在浏览器输入http://localhost:8080/?name=World,结果如下:
参考源码
小结
为了实现Servlet服务器,我们必须把jdk.httpserver提供的输入输出HttpExchange转换为Servlet标准定义的HttpServletRequest和HttpServletResponse接口,转换方式是Adapter模式;
转换后的HttpExchangeAdapter类再用HttpExchangeRequest和HttpExchangeResponse把读取和写入功能分开,使得结构更加清晰。